Make your first game in five steps
You are going to build Coin Dash: a title screen, one level with five coins and a pit of spikes, and two endings. It takes about thirty minutes, and everything you learn here is how every other game in the editor gets made.
Follow along live: open PlaysForge in another tab — it's free, runs in the browser, and everything below happens there.
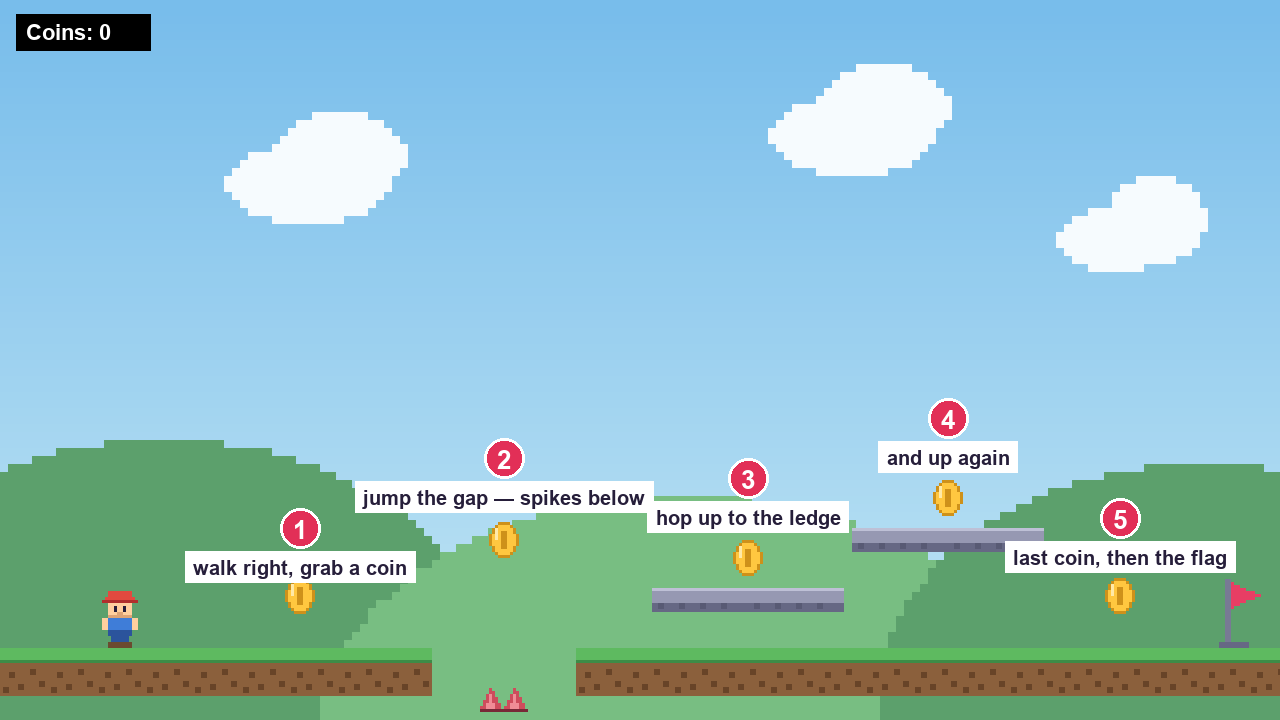
Want to see the finished thing first? On the games screen press New game, then Guided first game. That loads the exact game this guide builds, so you can play it, poke at it, and come back. Building it yourself is still the part that teaches you.
What's in this guide
How the editor is laid out
Across the top, under your game's name, is the build order: five numbered steps, in the order a game actually gets made. Click any step to work on it; you can jump back and forth freely. The rest of the window is that step's workspace. In the bar above it: your game's name, undo/redo, save, ▶ Test game and Publish.
Two words worth knowing before you start. A screen is one part of your game — a title, a level, an ending. Your cast is everything that can show up on a screen — the hero, coins, blocks of ground, spikes.
Your game
Name it, and list the screens players will move through.
Start a new game from the games screen: New game, then Blank game. Call it Coin Dash in the name box at the top, then make four screens:
- Click + Add screen three times, so you have four in total.
- Click each name and rename them: Title, Level 1, You win, Game over.
- On Title, press Start here — that's the screen players open on, and it stays marked from now on.
Each card shows what's on that screen ("12 things · 3 rules"), so an empty screen is obvious at a glance. All four are empty right now. That's fine — screens come first because every rule you write later needs somewhere to send the player.
Why four? One to start on, one to play, and one for each way the game can end. A game with no ending screens can't tell the player they won.
The cast
Everyone and everything that appears in your game, and what each can do.
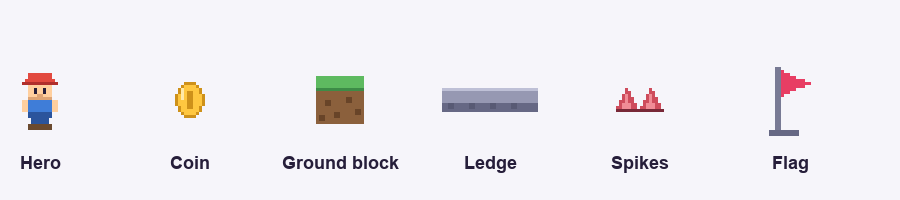
Drop your picture files into the Pictures & sounds box at the bottom of this step. Each picture becomes a cast member you can rename and give abilities to. Download the six pictures this guide uses, one per row of the table: Hero · Ground block · Ledge · Coin · Spikes · Flag. Or skip the files: the ready-made pieces under Add someone at the top of this step (Hero, Ground, Ledge, Pickup, Spikes) work just as well — the Hero one already walks and jumps, and Ground and Ledge are already solid.


| Cast member | Abilities | Solid? | What it's for |
|---|---|---|---|
| Hero | Platformer | no | The one you steer. Arrow keys and Space. |
| Ground block | — | yes | The floor. Repeat it across the screen. |
| Ledge | — | yes | Something to jump up onto. |
| Coin | — | no | The thing you collect. Five of them. |
| Spikes | — | no | Touch it and the run is over. |
| Flag | — | no | The goal. |
Give the Hero the Platformer ability (click + ability on its card): it walks with the arrow keys, jumps with Space, and falls. Then tick Solid on Ground block and Ledge — that's what makes them things you stand on rather than things you fall through.
Solid is the single most forgotten tick. If your hero drops straight through the floor when you test the game, this is why, every time.
Make the hero walk, not slide. One picture is one pose, so on its own the Hero glides across the level frozen mid-stand. Its card now says One still picture: click Bring it to life (free) and the same picture gets a walk, a run, a jump, a crouch and the rest, played by itself as the Hero moves. Open Moves on the card to watch them. Undo takes it back.
Build the level
Put the cast on the screen. Drag from the left; the right shows what's selected.
Pick Level 1 from the Screen row at the top of step 3. Press ▶ Play this screen at the top of the tools whenever you want to try the level — it plays just this screen, before the title and the rules exist, and Stop brings you back. Then drag cast members from Drop in onto the level. Select anything you've placed to nudge its position in the panel on the right.
The level is 1280 wide and 720 tall. Here is the exact layout in the picture above:
| What | Where | Notes |
|---|---|---|
| Ground blocks | y 672, x 24 → 1272 every 48 | Leave out x 456–552: that's the gap. |
| Spikes | 504, 700 | At the bottom of the gap. |
| Ledge ×2 | 700, 600 · 796, 600 | Side by side = one wide ledge. |
| Ledge ×2 | 900, 540 · 996, 540 | The second step up. |
| Coins | 300,596 · 504,540 · 748,558 · 948,498 · 1120,596 | Five, one per beat of the level. |
| Flag | 1240, 612 | The goal, on the ground at the end. |
| Hero | 120, 618 | Standing on the ground, facing the level. |
Floors the quick way. Instead of twenty-six ground blocks, place one Ground, select it, and drag the handle on its right edge until it reaches the gap (x 456). Place a second one after the gap and stretch it to the end of the screen. Two pieces, same floor — the collision follows the stretch.
The one number that decides your whole level
The Hero's jump rises about 92 pixels and carries it roughly 160 across. Every ledge in this level is 60 pixels above the surface below it, and the gap is 144 pixels wide. Both sit comfortably inside what the jump can do.
Ledges here were first built 88 pixels up, because the physics formula says the jump rises 112. In the real game loop it only rises 92, and landing on those ledges was a coin flip. If a jump in your level feels unfair, it probably is: lower the ledge, don't practise harder.
Make ledges out of two blocks side by side. One block is 96 wide, which is about as far as the hero travels while jumping — so a single-block ledge means landing on a target the same size as your margin for error. Two blocks turns a stunt into a step.
Hold the jump button
The 92 pixels above are a held jump. Tapping the key cuts the rise to roughly a third of that, because the height is meant to be yours to choose — a tap to hop a spike, a hold to reach a ledge. Worth knowing before you decide a ledge of yours is unreachable and lower it: try holding the key first.
Distance: backgrounds that drift
A sky that slides past at the same speed as the floor reads as a wall. Give it its own layer and slow it down, and the level suddenly has depth.
One catch before you try it here: Coin Dash's level is 1280 wide — exactly one screen, so the camera never travels and nothing can drift against anything. Parallax only shows itself on a level wider than the screen. So make Level 1 wider first: in step 3, the Level size box (just under Layers) has 2 screens and 3 screens buttons, and the gold frame on the canvas grows to show the new edge. Stretch the floor out to meet it, then come back.
In the Layers box in the tools column (under Drop in, Stamps and Paint):
- + Add makes a layer — but it arrives in front of everything. Press ↓ until it sits below your main layer. Top of that list is nearest the player.
- ⋯ → Scroll speed is the whole trick. 1 moves with the camera, 0.5 drifts behind it, 0 is pinned to the screen. A far vista likes about 0.6 sideways and 0.25 up and down — hills far away barely rise when you jump.
- Click the layer's name to work on it, then drag your backdrop in from Drop in. "Lands on …" tells you which layer you are about to drop onto.
Anything the game creates while it runs — a thrown sword, a spawned enemy — is born on the backmost layer. So the moment you put a background layer behind your level, those things appear on the background, drifting at its scroll speed while the thing they actually hit stays on the floor. The bigger the level, the further apart they drift.
On any screen where something spawns, keep one layer and push the backdrop behind the action with In front / behind → ⇊ Back in the panel on the right. Separate layers are free of this on title screens, cards, and any level that spawns nothing.
Where to put the backdrop. On a slowed layer the picture does not sit where you would think. At scroll speed 0.6 on a 2560-wide level, its centre belongs at 768 — that is 2560 ÷ 2 × 0.6 — not at 1280. Centre it on the level instead and the picture looks right until you walk to the start, where the left of the screen is bare.
Working faster
Placing forty ground blocks one at a time is nobody's idea of a game. Everything here works on one thing or on a whole crowd.
| To do this | Press |
|---|---|
| Pick several things | Shift + click, or Shift + drag a band over them |
| Pick everything on the screen | Ctrl + A |
| Copy and paste (lands under the mouse) | Ctrl + C, then Ctrl + V |
| One more, just off to the side | Ctrl + D |
| Nudge a pixel · a whole square | Arrows · Shift + arrows |
| In front of / behind its neighbours | ] and [ · all the way with Shift |
| Take it off the screen | Delete |
| Undo, redo | Ctrl + Z · Ctrl + Y |
Drag any one of a group you have picked and the whole group moves, keeping its spacing. The same list is in the editor under Keyboard shortcuts, at the bottom of the tools column.
Rules
One sentence each: when something happens, then something else does.
First, the number the game keeps track of. In Numbers your game keeps track of,
add one called coins and leave it set to kept between screens — the
count has to survive the trip to the "You win" screen.
On Level 1
That third rule is the whole game design in one line: reaching the flag isn't enough, you have to have collected everything. Because the two conditions sit on the same rule, touching the flag with four coins does nothing at all — the player just walks past it and goes looking.
On Title, You win, and Game over
Add one more on Title: when the scene starts → set coins to
0. Without it, your second play-through starts with the coins from your first, and the flag
opens immediately.
Show the count on screen
Switch to On-screen stats at the top of this step and add a text readout with the
label Coins: reading the coins number. That's the box in the corner of
the picture at the top of this guide.
Test & share
Play it the way a player will, then send it out as one file.
Press the big ▶. The game starts on your Title screen, exactly as a player would see it — not on whichever screen you were last editing.
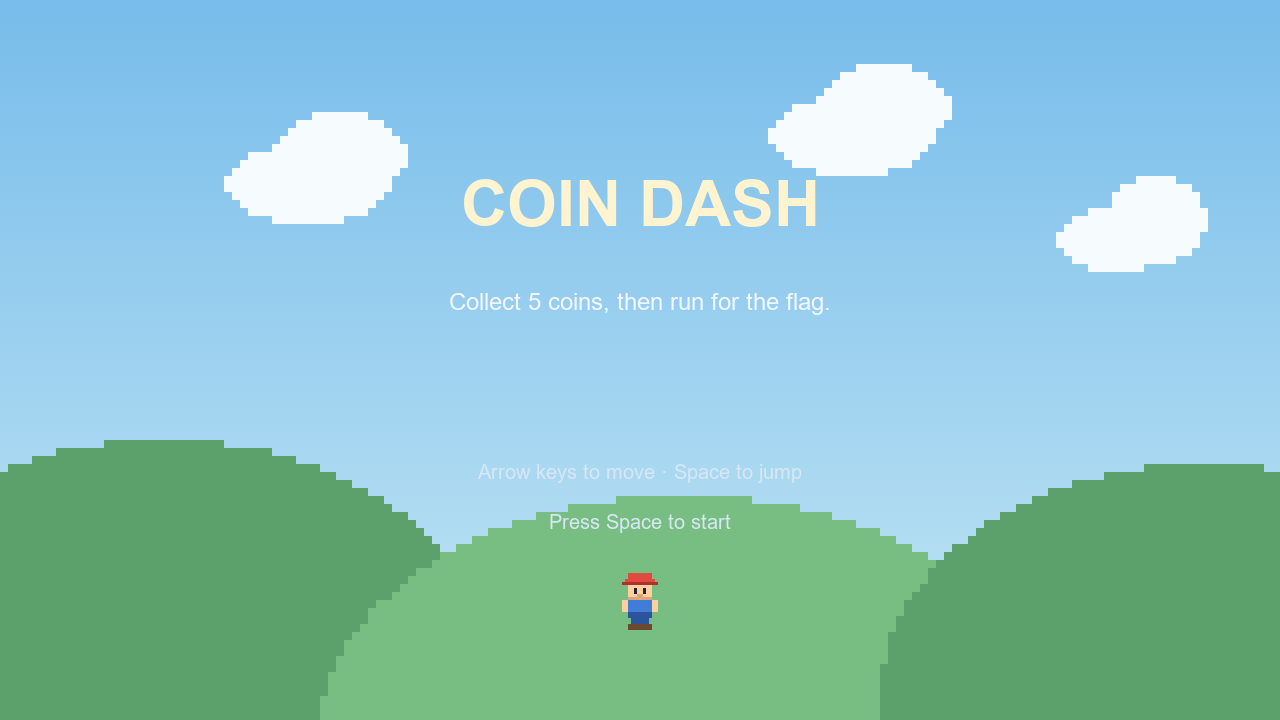
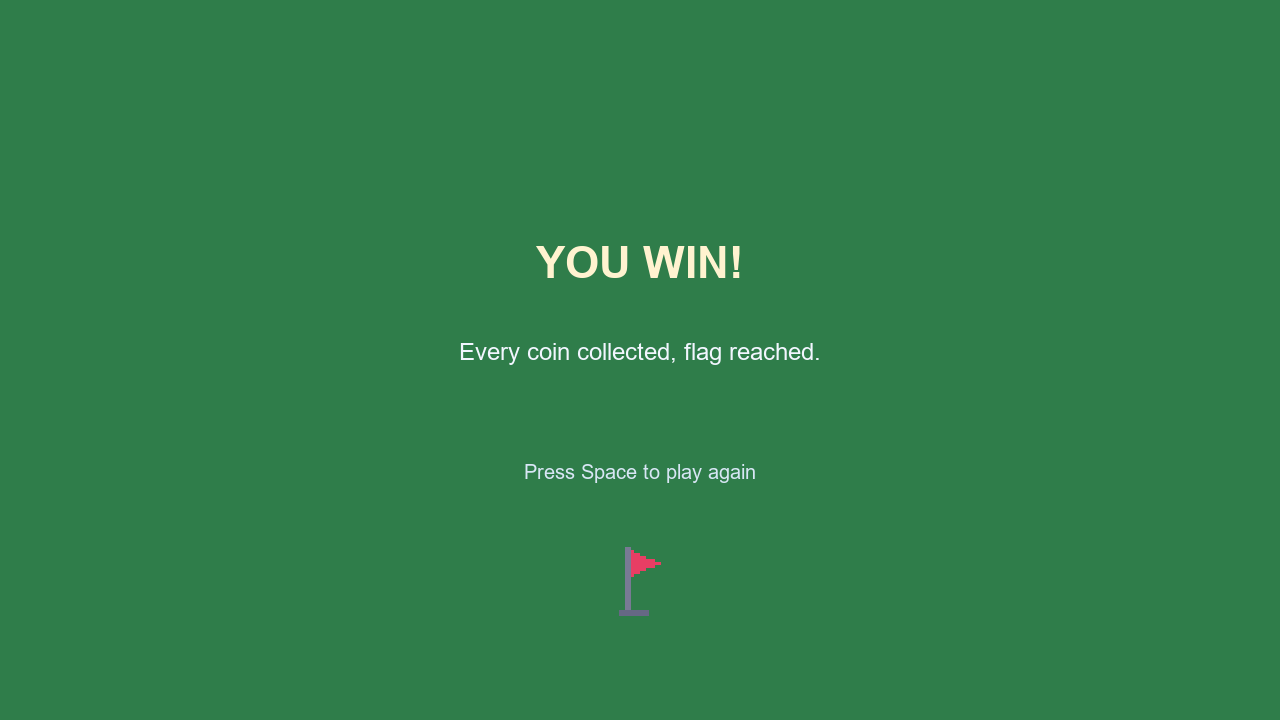
The checklist beside the game catches the things that only bite after you've shared it: a screen nothing leads to, a screen with nothing on it, art that never uploaded, no starting screen. Each one links back to the step that fixes it. Get four ticks, then Download as one HTML file — that file is your whole game, and it runs in any browser with nothing else installed.
When it goes wrong
Every one of these happened while building the version of Coin Dash in this guide.
The hero falls straight through the floor
The ground isn't marked Solid. Step 2, tick the box on the card.
The hero can't reach a ledge
Jumps rise about 92 pixels, not the 112 the formula promises. Keep ledges 60–70 above the surface below.
A coin can never be collected
It's either tucked under a ledge, or sitting in the arc of a jump — the hero sails over it. Put coins where a walking player meets them.
The hero falls off the end of the world
Your ground stops before the screen edge. Run the blocks past 1280 so there's floor under the last few steps.
The character on the title screen drops away
It has the Platformer ability but there's no ground on that screen. Use a second, plain copy with no abilities for decoration.
Pressing Space does nothing
Rules belong to one screen. Check the Screen row at the top of the step — you may have written it on the wrong one.
A thrown or spawned thing appears in the wrong place
It was born on the backmost layer, so it drifts at that layer's scroll speed while its target stays put. Use one layer for that screen and set depth instead.
The background leaves the screen bare at the start
It's centred on the level instead of on the level times its scroll speed. A 2560-wide level at 0.6 wants its backdrop centred at 768.
Make it yours
The game works. Now break it in interesting ways:
- Add a second level. Make the flag on Level 1 go there instead of to "You win".
- Add
livesas a kept number, start it at 3, and take one away instead of ending the run on spikes. Send the player to "Game over" only when it reaches 0. - Give the coins a bob: add a tween on the scene start so they float up and down.
- Put an enemy in — a cast member with the Patrol ability walks back and forth on its own — and write the same "touches → Game over" rule for it.
- Change the jump: on the Hero's Platformer ability, raise
jumpSpeedand see how much of your level stops making sense. That's level design.
Ready for more? Make a game like Mothwell — a hero who dashes and runs up walls, enemies, rooms joined by doors, a shaft to climb, and a background with depth.
The finished game is bundled in the editor as 💰 Coin Dash, and its source lives in
apps/editor/src/templates.ts. The art was generated by
assets/coin-dash/make_art.py; the pictures in this guide by
assets/coin-dash/make_guide_images.py.